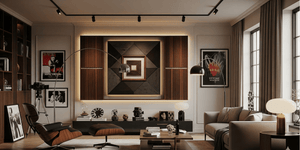
DIY Guide: How to Install a Wall Sconce and Elevate Your Decor
As touched upon in our recent writing, wall sconces are a practical and stylish way to enhance any room. They provide soft, ambient lighting, free up space, and draw attention to key areas like hallways, mirrors, or bedside tables. Whether you want to add warmth to a bedroom or create a well-lit entryway, installing a wall sconce is a straightforward project that can instantly improve your home’s look and feel. As mentioned in Decorative Wall Sconce Lighting – Lightology, "Wall sconces are versatile and can be used in various settings, including living rooms, hallways, bedrooms, bathrooms, and even commercial spaces like hotels, restaurants, and retail stores. They conserve floor space, making them ideal for smaller rooms or areas where floor and table space is limited"
This guide will walk you through the installation process step by step, ensuring you get it done safely and correctly. From choosing the right placement to wiring and securing the fixture, you’ll have everything you need to complete the job with confidence. No fluff—just clear, actionable instructions to help you get it right the first time. By the end, you’ll not only have a functional light but a stylish upgrade that transforms your space.
Tools and Materials You Need
Before you start, gather everything. This saves time and makes the process smoother. Having everything on hand also prevents unnecessary trips to the hardware store in the middle of installation.
Tools:
- Drill – To secure the mounting bracket to the wall.
- Screwdriver – To tighten screws on the bracket and fixture.
- Wire stripper – To remove insulation from wires for clean connections.
- Voltage tester – To ensure there’s no electricity running through the wires.
- Level – To make sure the sconce is straight.
- Measuring tape – To measure placement accurately.
- Pencil – To mark where the sconce will go.
- Electrical tape – To secure wire connections and add safety.
Materials:
- Wall sconce – The main fixture you’ll be installing.
- Light bulbs – Make sure to get the correct wattage and type.
- Mounting bracket – Usually included with the sconce.
Having the right tools and materials makes installation easier. Double-check that you have everything before you begin.
Step 1: Choose the Right Placement
The right height and position matter. A poorly placed sconce can look awkward or shine light in the wrong direction. It should be both functional and visually balanced with the rest of the room. As found in ETHNIK LIVING, "The placement of wall sconces is an art that can elevate the overall look and feel of your home. By strategically positioning sconces in various rooms, you can achieve both practical lighting solutions and a visually pleasing atmosphere"
Placement Tips:
- For general lighting, mount it 60–72 inches from the floor. This height keeps it at a natural eye level.
- If installing two sconces on both sides of a mirror, space them about 36–40 inches apart. This ensures even lighting without harsh shadows.
- In a bedroom, place them just above eye level when sitting up in bed. This prevents glare and makes them useful for reading.
Mark the placement with a pencil before drilling. Use a level to ensure it’s straight. If the sconce will be used for reading or accent lighting, consider angling it slightly for the best effect.
Step 2: Turn Off the Power
Safety first. Go to your breaker box and turn off power to the circuit where you’ll install the sconce. Never assume a switch being off means there’s no power—always double-check.
Use a voltage tester to confirm. Hold it against the wires where you’ll be working. If it beeps or lights up, the power is still on. Try another breaker switch if needed. If you’re unsure which breaker controls the area, label them for future reference. Based on information from PacLights, "Before beginning any electrical installation, safety must be your top priority. Ensure you turn off the power at the circuit breaker to eliminate the risk of electric shock during the installation process. It’s also wise to wear non-conductive gloves and use tools with insulated handles."
Once you’re certain there’s no electricity flowing, you can safely move forward.


Step 3: Remove the Old Fixture (If Replacing One)
If you’re replacing an old sconce, carefully unscrew it from the wall. Most sconces are attached with two or three screws. Keep track of any washers or mounting pieces that come off with it.
Understanding the Wires:
- Black (hot) – Carries power to the fixture.
- White (neutral) – Completes the circuit.
- Green or bare (ground) – Provides safety in case of an electrical fault.
Carefully disconnect the wires by unscrewing the wire nuts. If the existing wiring looks frayed or damaged, you may need to cut and strip fresh ends before reconnecting.
Step 4: Install the Mounting Bracket
Mounting the Bracket:
- Your new sconce should come with a mounting bracket. This piece secures the fixture to the wall and supports its weight.
- Align it with your markings and secure it with screws. If there’s an electrical box behind the wall, screw the bracket into it.
- If there’s no electrical box, you’ll need to install one or use a wireless battery-operated sconce as an alternative.
- If mounting on drywall, use wall anchors to keep the fixture secure. Without them, the weight of the sconce could pull it loose over time.
- Black to black (hot) – This is the live wire carrying power.
- White to white (neutral) – This completes the circuit.
- Green or bare to green/bare (ground) – This prevents electrical hazards.
- Align the sconce with the mounting bracket. The fixture should sit flush against the wall.
- Secure it with screws. Don’t overtighten, or you might strip the screws or damage the wall.
- Check if it’s level before fully tightening. A crooked sconce is noticeable, so adjust it before finishing.
A secure bracket ensures the sconce stays in place without sagging or shifting.
Step 5: Connect the Wires
Now, connect the wires from the wall to the wires from the sconce:
Twist the wires together and secure them with wire nuts. Make sure they are tight, as loose connections can cause flickering or shorts. Wrap electrical tape around the connections for extra security.
Tuck the wires neatly into the electrical box so they don’t get pinched when mounting the sconce.
Step 6: Attach the Sconce to the Wall
Now it’s time to mount the fixture:
If your sconce has a decorative cover or shade, attach it last.
Step 7: Install the Bulb and Restore Power
Screw in the light bulb. Make sure it matches the recommended wattage for the fixture. Some sconces are designed for LED bulbs, which last longer and use less energy. As outlined in Enkonn Solar:
“Every light fixture and lamp has a maximum wattage rating, indicating the highest power bulb you should safely use. This is often marked on or near the fixture. Exceeding this limit can cause overheating, leading to damage or even fire hazards. Always check and follow these ratings when selecting bulbs.”
Go back to the breaker box and turn the power back on. Flip the switch and test the light.
If it doesn’t turn on, double-check:
- Is the bulb working?
- Are the wires connected correctly?
- Did you turn the right breaker back on?
- If there’s flickering or buzzing, turn off the power and recheck the wiring.
Troubleshooting Tips
If the light won’t turn on:
- Make sure the power is on.
- Check that the wires are securely connected.
- Try a different bulb.
If the fixture flickers:
- The bulb may be loose. Tighten it.
- The wiring may need adjusting. Turn off power and check the connections.
- If using a dimmer switch, make sure the bulb is dimmable.
Styling Tips: Making the Most of Your Sconce
As we mentioned before, a wall sconce isn’t just about lighting—it can change the mood of a room. Here’s how to make it work for your space:
- Layer your lighting: Use sconces along with ceiling lights and table lamps for a balanced look.
- Use dimmable bulbs: This lets you adjust brightness for different settings.
- Pick the right shade: A frosted glass shade softens the light. A clear shade gives a brighter, more direct glow.
- Match the metal finish: If your home has brass hardware, a brass sconce will blend in well.
A well-placed sconce can act as both decor and function, making your home feel cozy and well-lit.
Final Thoughts
As we elaborated on earlier, installing a wall sconce is a simple way to improve your decor. It adds style, saves space, and creates a warm atmosphere.
If you follow these steps, you’ll have a new light fixture up in no time. No need to hire an electrician if you’re comfortable working with wiring. But if you're unsure, call a professional. It’s better to be safe than to deal with electrical issues later.
Lighting matters. Get it right, and your space will feel brand new. A well-placed sconce can turn a dull wall into a design feature, making your home feel more inviting. So take your time, choose a style that fits your space, and enjoy the results.
Ready to Transform Your Space?
Browse Urban Ambiance's curated collection of wall sconces—where style meets function. Find the perfect fixture to elevate your home’s lighting and bring your design vision to life. Shop now and light up your walls with purpose.


